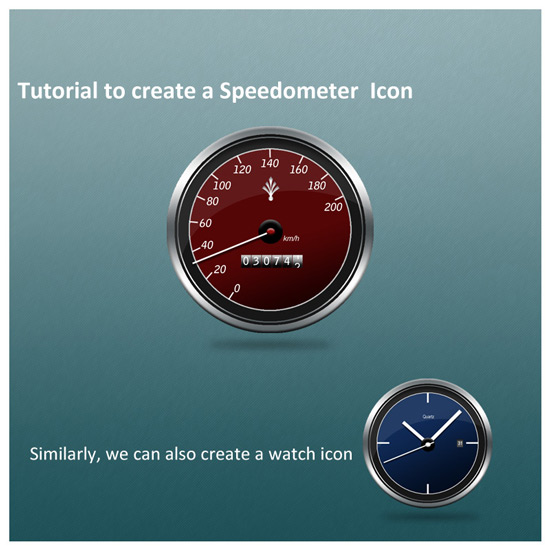
In this tutorial, we’ll create a Speedometer/Gauge icon in photoshop.
Step 1
Create a new document of size 600×600 and with any background color or texture of your size. Here I have used some texture for the background.
Step 2
Create a new layer. Draw a circle using the elliptical marquee tool and fill it with #232323 color.

Step 3
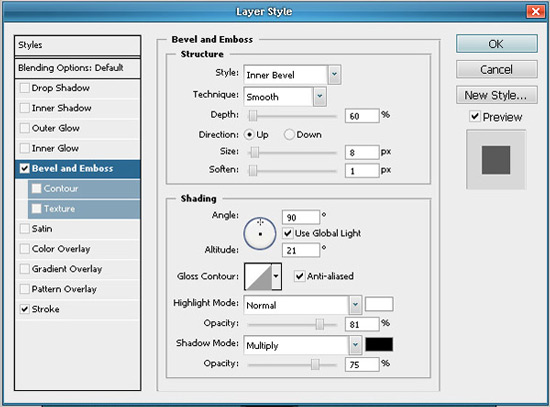
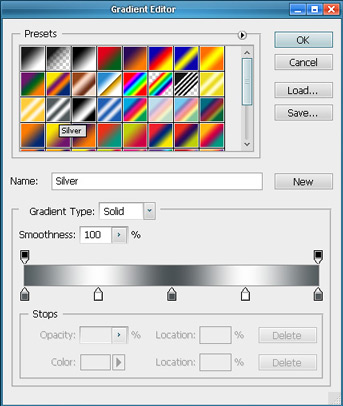
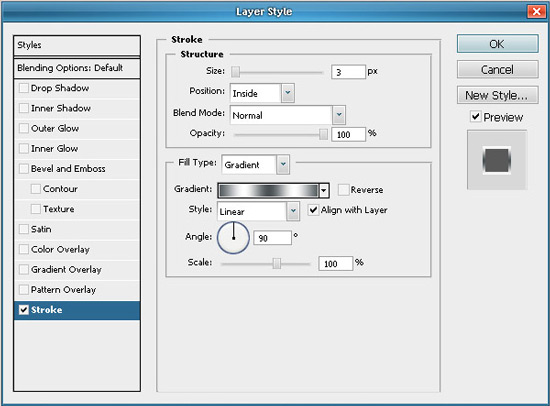
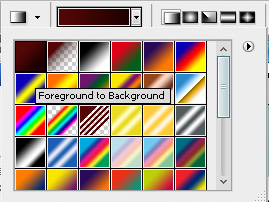
Now open the blending options for this shape and apply the following effects on the layer. Apply a silver gradient to the stroke. This gradient is a preset with photoshop.
Step 4
Now draw another circle within the outer circle on a different layer. Fill this layer with any color.

Step 5
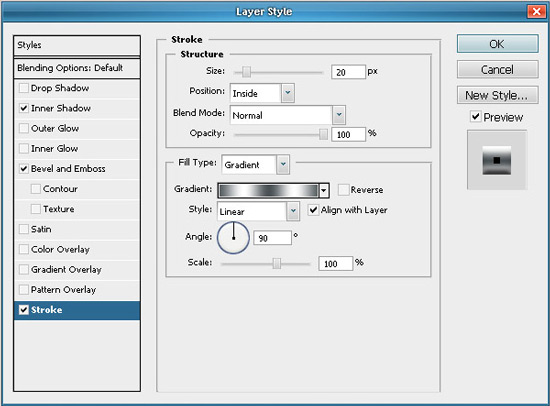
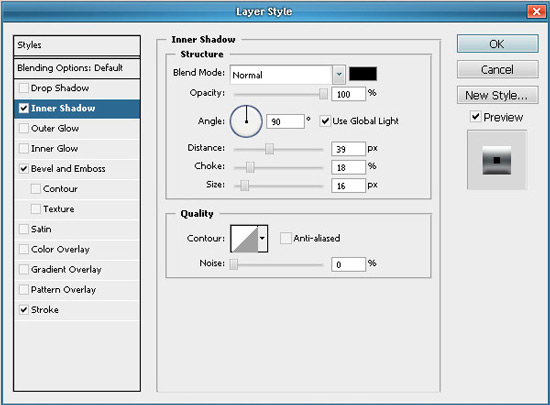
Now apply a stroke to this newly created circle with the below shown settings. Next set the fill for this layer to 0% so that only the stroke for this layer is visible.
Step 6
Again draw a circle on a new layer, above the previous circle, but this time of comparitively smaller size. Apply the stroke settings to this circular layer and fill the layer with a gradient of your choice. Here I have used two dark shades of red. Also apply some stroke to this layer.

Step 7
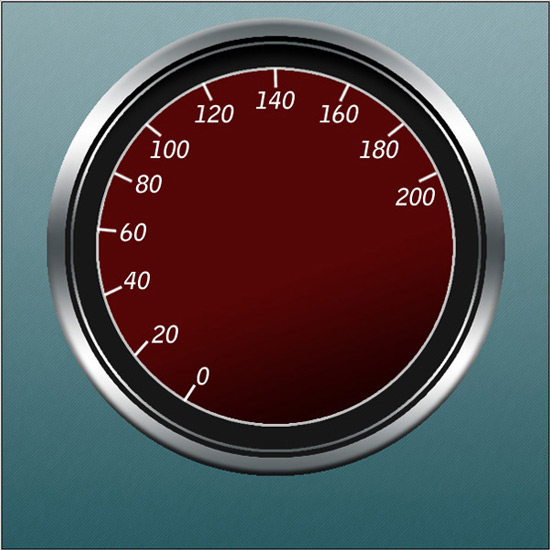
Using the line tool, draw a small line shape of width 3px and foreground color white, for the dial markings of the gauge. also repeat the step to draw as many marking as you want. Corresponding to each mark, add some number, as shown below.

Step 8
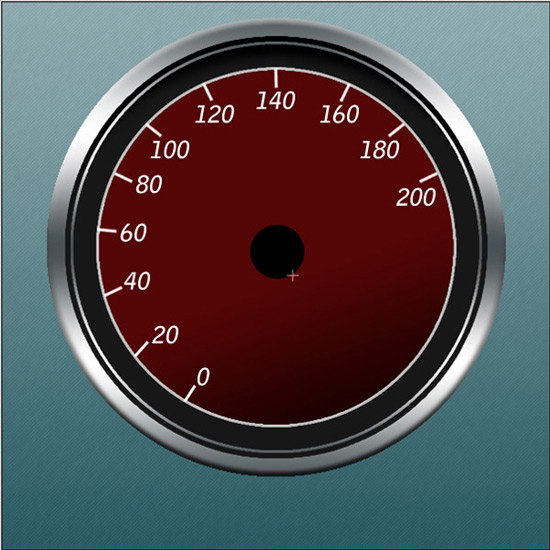
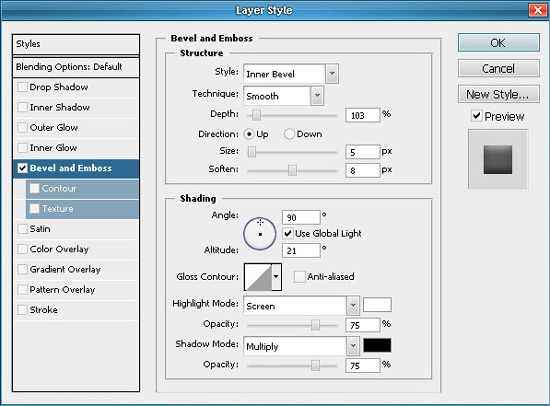
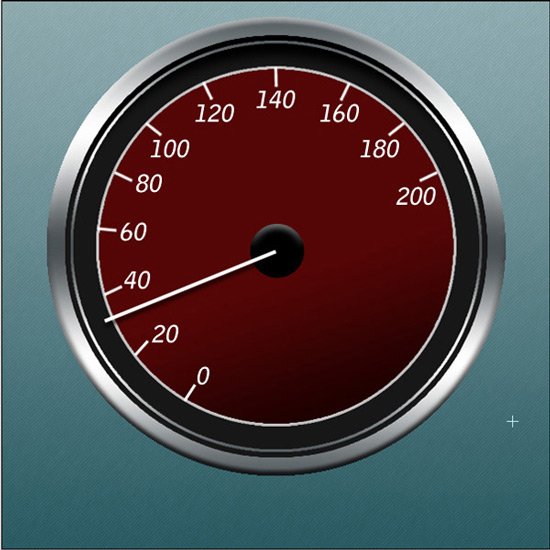
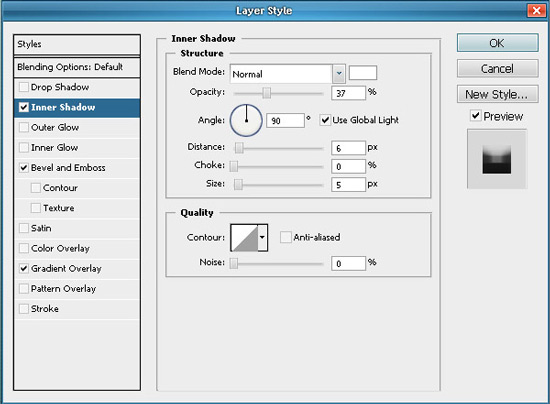
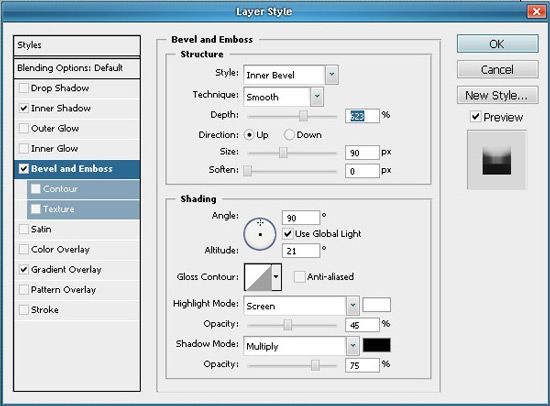
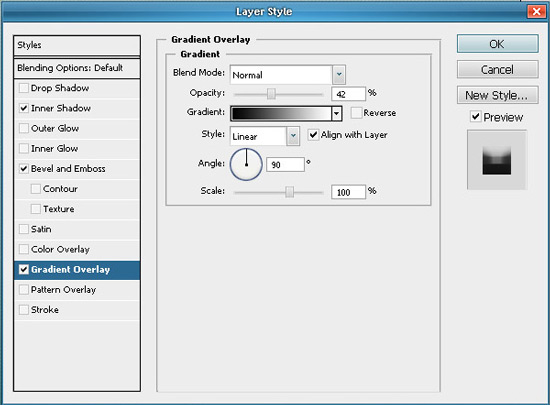
Next draw a small circle in the center and apply the following blending options to it. Also draw the needle for the gauge using the line tool of about 4-5px width. Finally, add some drop shadow to the needle.
Step 9
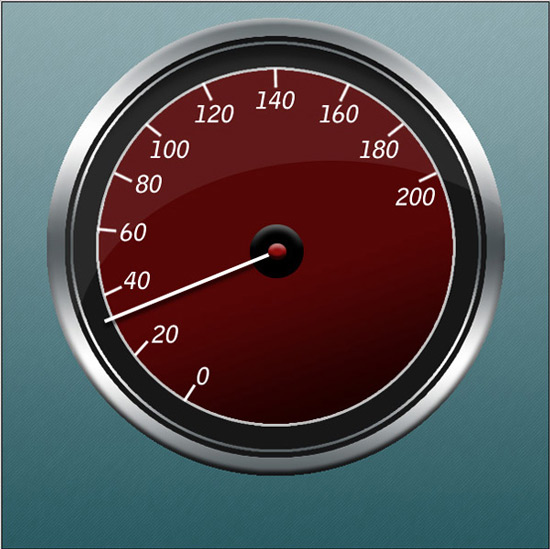
Similarly create another small circle in the center, above the recently drawn circle. Fill this one with red color and apply the same blending options, as applied to the previous one.
Step 10
Now using Ctrl+Click, on the thumbnail of the layer, select the outermost circle, that is the bottom most one. Your outermost circular layer will be selected. Now in the toolbar above, select ‘subtract from layer’ option and draw another circle, to give a shape similar to the one drawn below. With the shape selected, create a new layer and fill it with white color.

Step 11
Decrease the opacity of this layer to about 8% to give a effect as shown below.
Step 12
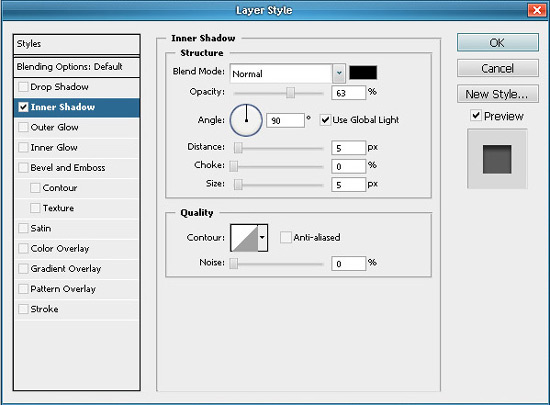
Next for the number display, draw a small rectangle and apply the following blending options to that layer.
Step 14
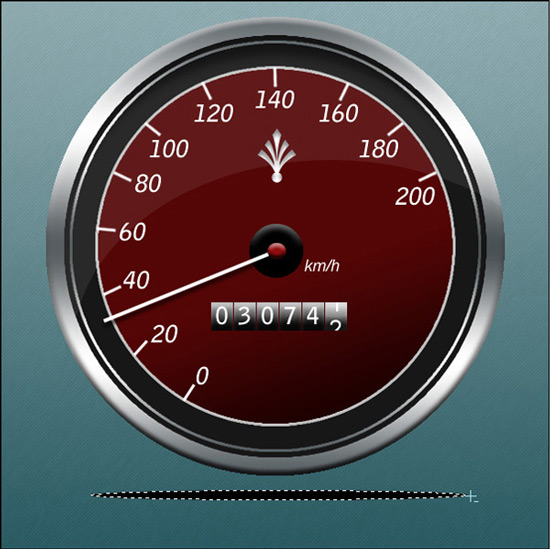
Add some text like km/h or mph wherever you like and add some logo or shape on the dial.

Step 15
Next to get the shadow effect, just draw a thin ellipse, crate a new layer and fill it with black color. Gaussian Blur the layer with a value of about 6 and decreae the opacity to about 50%.
Step 16
In the similar manner you can create a watch also. Just change the number and position of the marks on the dial. Create a 2 more needles, but thick then the previous one. To create the date display, draw a small rectangle on a new layer and apply the following blending options to it.
Finally
Here are the two completed icons.
commenting usually isnt my thing, but ive spent an hour on the site, so thanks for the info
it is good??thanks
nice! txs
Nice posting this is helpful for me, thanks
ok tutorial, the thing is at times it is hard to understand what you are referring to. i.e. subtract from layer , where ?? tutorials that are done must pretty much take the hand of the viewer and show them exactly where everything is and all, you just need to explain thing a bit more thoroughly. nevertheless, good tutorial. cheers
the steps which is given here to design the speed gauge and watch icon using Photoshop is good. The designing method is good. Good effort. Keep it up:)
It`s not easy (
Very nice, step 10 was a little confusing, but otherwise a nice little project for us beginners.
Thank You
thanks for the tutorial I didn’t realise how easy it is to actually draw things like this with photoshop. I spent 20 minutes and made a very professional looking speed clock using this tutorial. thanks
thanks for this excellent tutorial
great tutorial
thank you for sharing!
A good and detailed tutorial. Worth a try. Keep up the good work.
Ok tutorial. I was curious if there is a better way to “array” the tic marks around the circle. This would 1) be faster, 2) permit for more accurate spacing of tics
great tutorial 🙂
Good tutorial. It would be MUCH easier though to create this in Illustrator, because of the transformation commands that would allow you to create the tic marks with just ONE command!
Great tutorial, thanks for putting it together! I have a project this would be perfect for. Keep up the great work!
what an amazing tutorial, i would love to see one of the gauges come to life with a little jquery and perhaps some html 5!
Very Beatiful Icon,Very Excellent Turtorial
I clicked on this thinking it was a Clock tutorial. Took me a while to realize it wasn’t 😀
Nice tutorial though!
I see your design step by step. I honorable to really awesome. Thanks you so much for your tutorial..
Clipping Path Service
so useful! thanks
Very Beatiful Icon,Very Excellent Turtorial
thanks for this grate information.
Outstanding post. You have explained very well. Thanks!
Hello admin, i’ve been reading your articles for some time and I really like coming back here.
I can see that you probably don’t make money on your site.
I know one awesome method of earning money, I think you will
like it. Search google for: dracko’s tricks
High quality post. Your post is always hit.
Magnificent goods from you, man. I’ve keep in mind your stuff previous to and you are simply too magnificent.
I really like what you’ve received here, certainly like what you’re stating and
the best way through which you say it. You are making it enjoyable and you
continue to take care of to stay it sensible.
I can not wait to read much more from you.
That is actually a wonderful site.
thanks for the information
Nice post!!!! great job admin.
Nice one!
Thanks for Sharing!
What a lovely icon, and what a really excellent guide!